
Traceless Adhesive Installation Guide

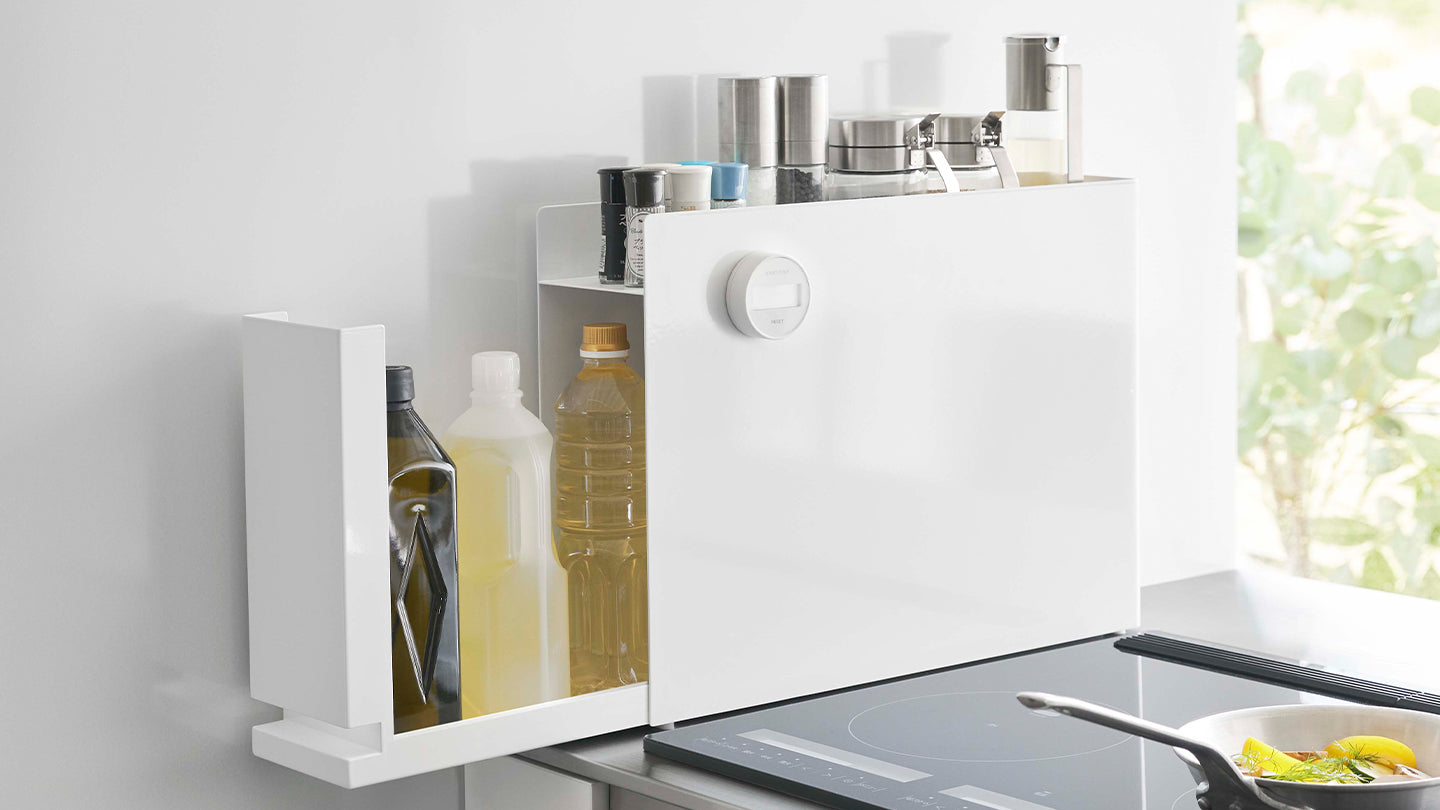
Say goodbye to cluttered, crowded sink areas and hello to a splash-free, sparkly-clean experience. Our new traceless adhesives leave walls undamaged and offer improved aesthetics, convenience, and hygiene.
Learn more with this easy installation guide!
Before You Begin:
Check the adhesive film for any creasing or warping prior to installation as these will prevent secure mounting. If the film appears to be damaged, please contact our customer service. Once the adhesive is installed, check that the mounting is secure before use.
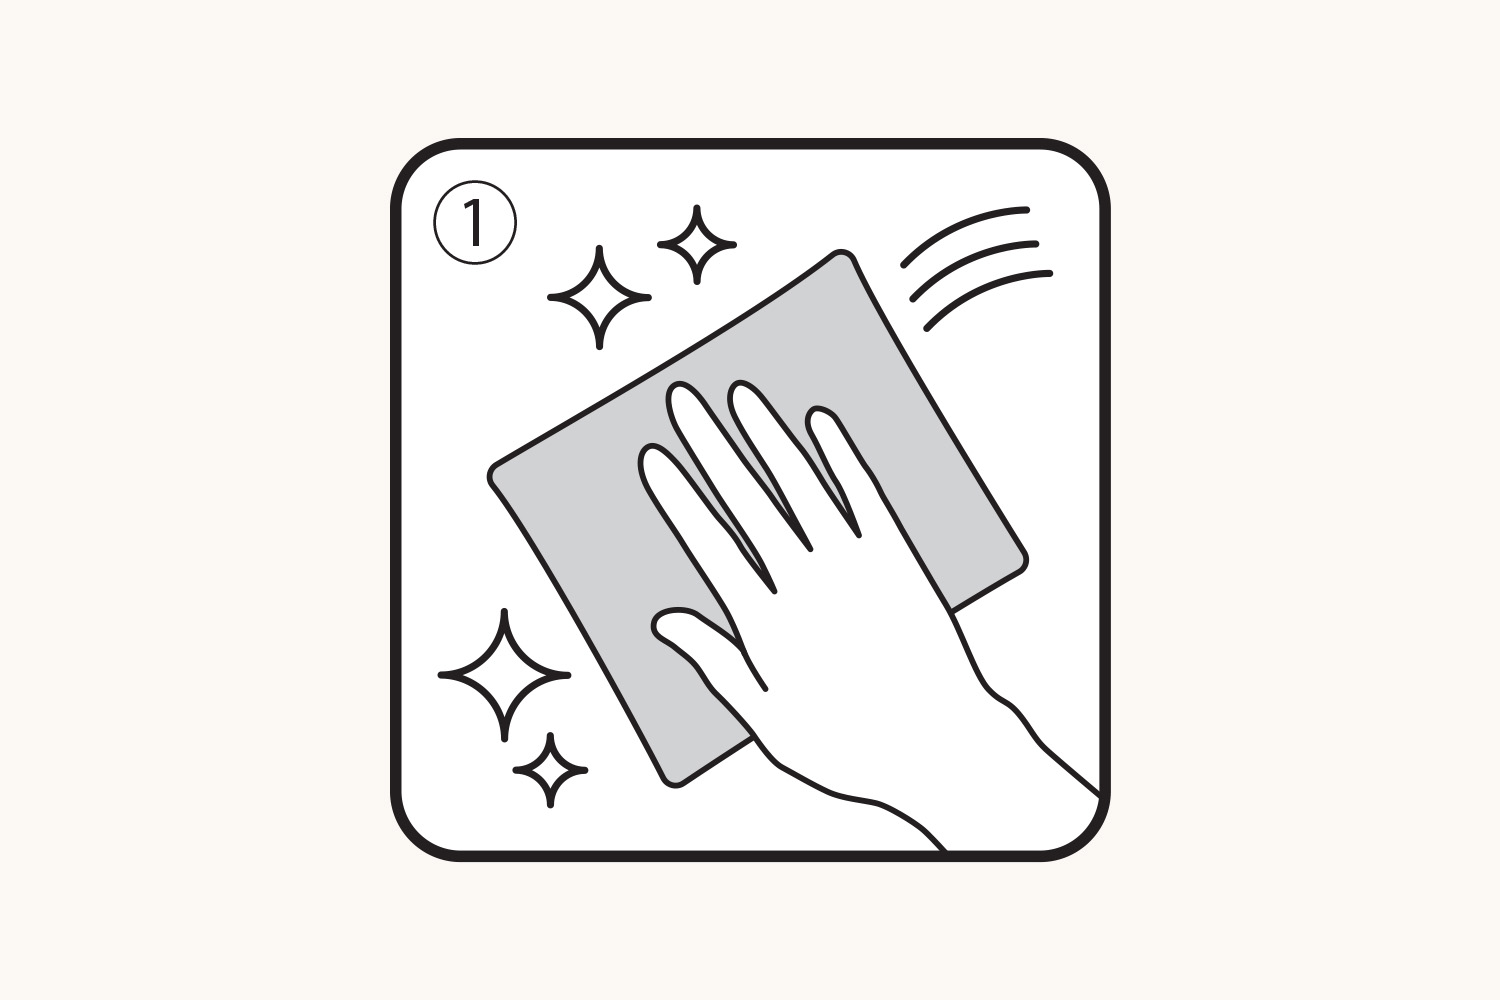
1.
Choose a smooth mounting surface, such as tile, glass, or steel. Prepare the surface by thoroughly wiping it clean and allowing it to dry before installation.
This is an important step in order to ensure secure attachment! We recommend cleaning the surface with alcohol and wiping it dry with microfiber cloth or any other fabric that does not shed fibers.
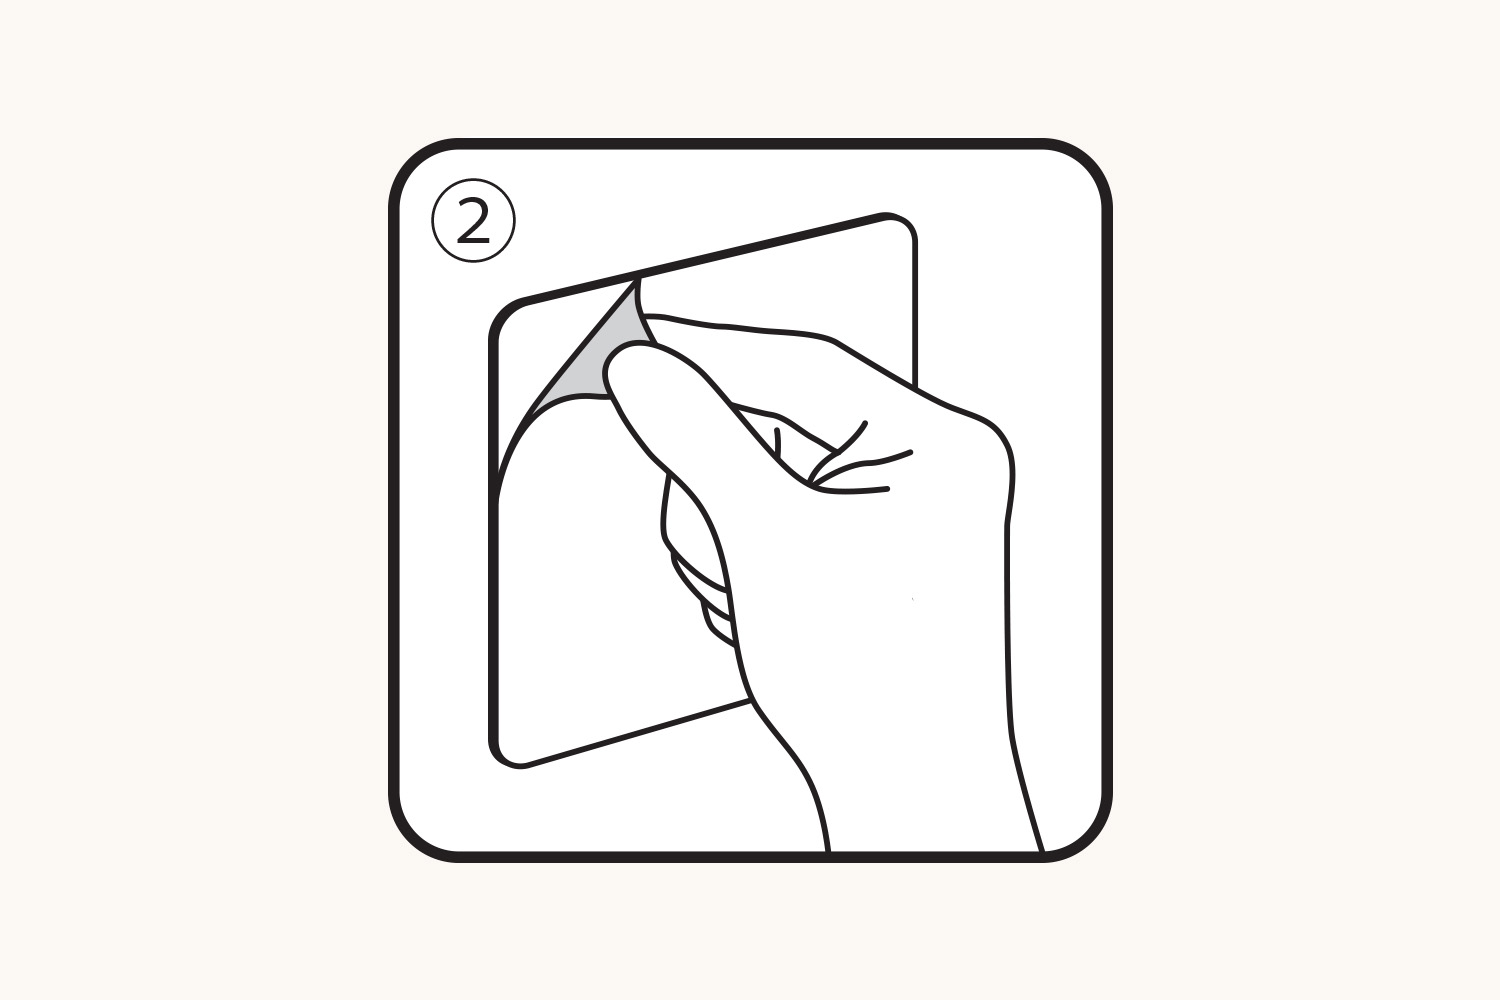
2.
Remove the protective film from the adhesive side and attach it to the wall, checking that the square film is parallel to the floor. Avoid touching the adhesive side once the protective film is removed as this can reduce effectivity.
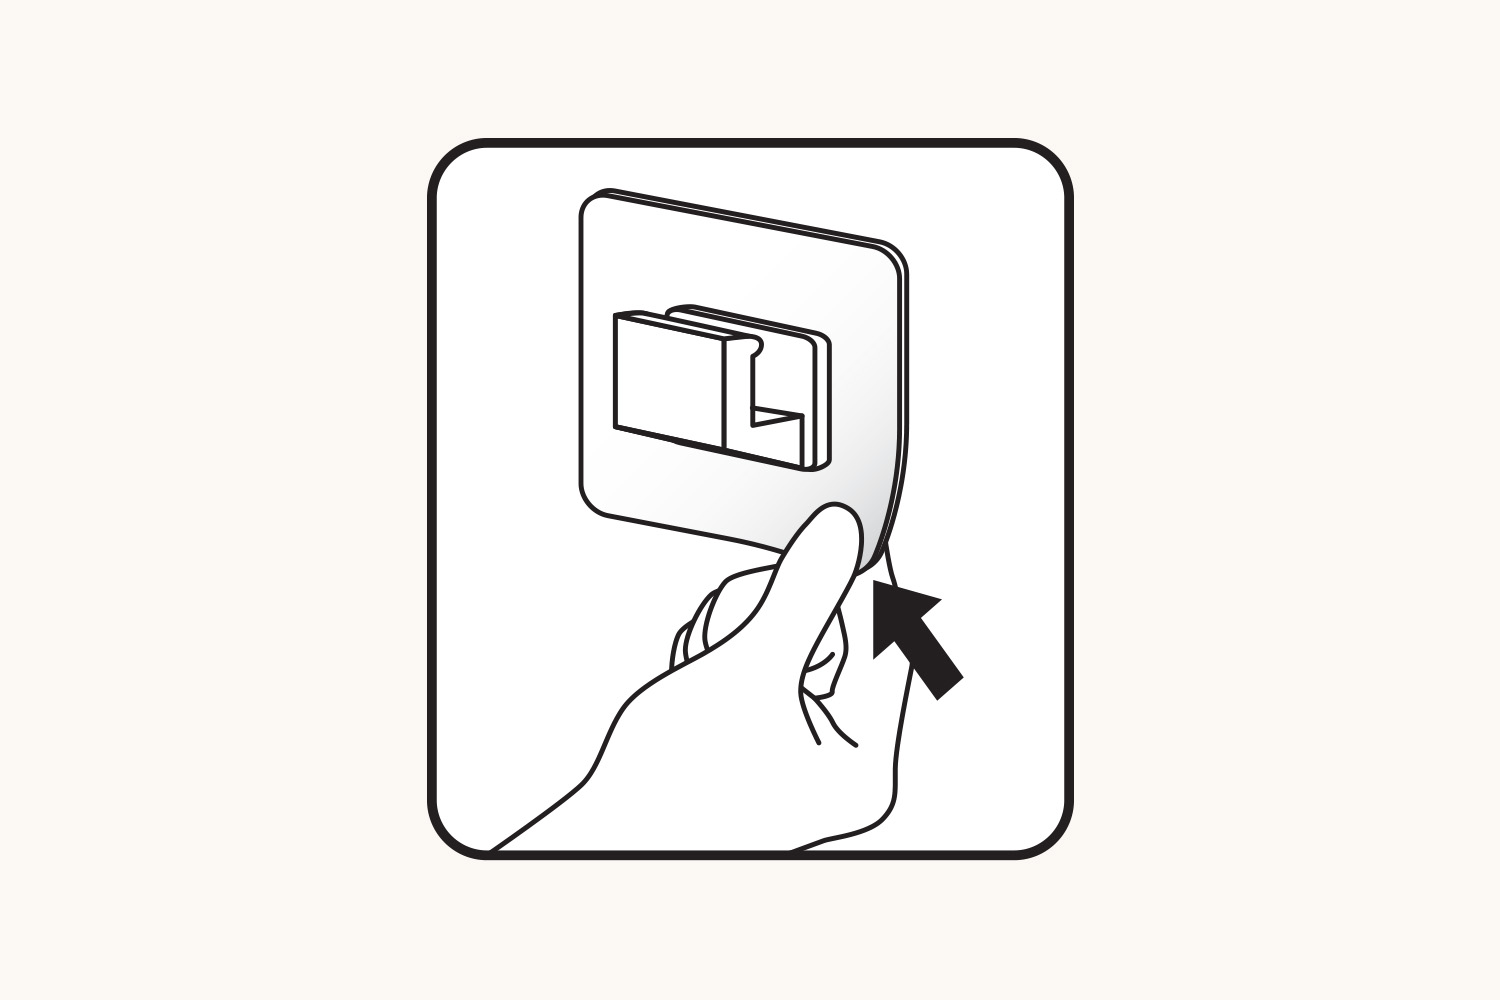
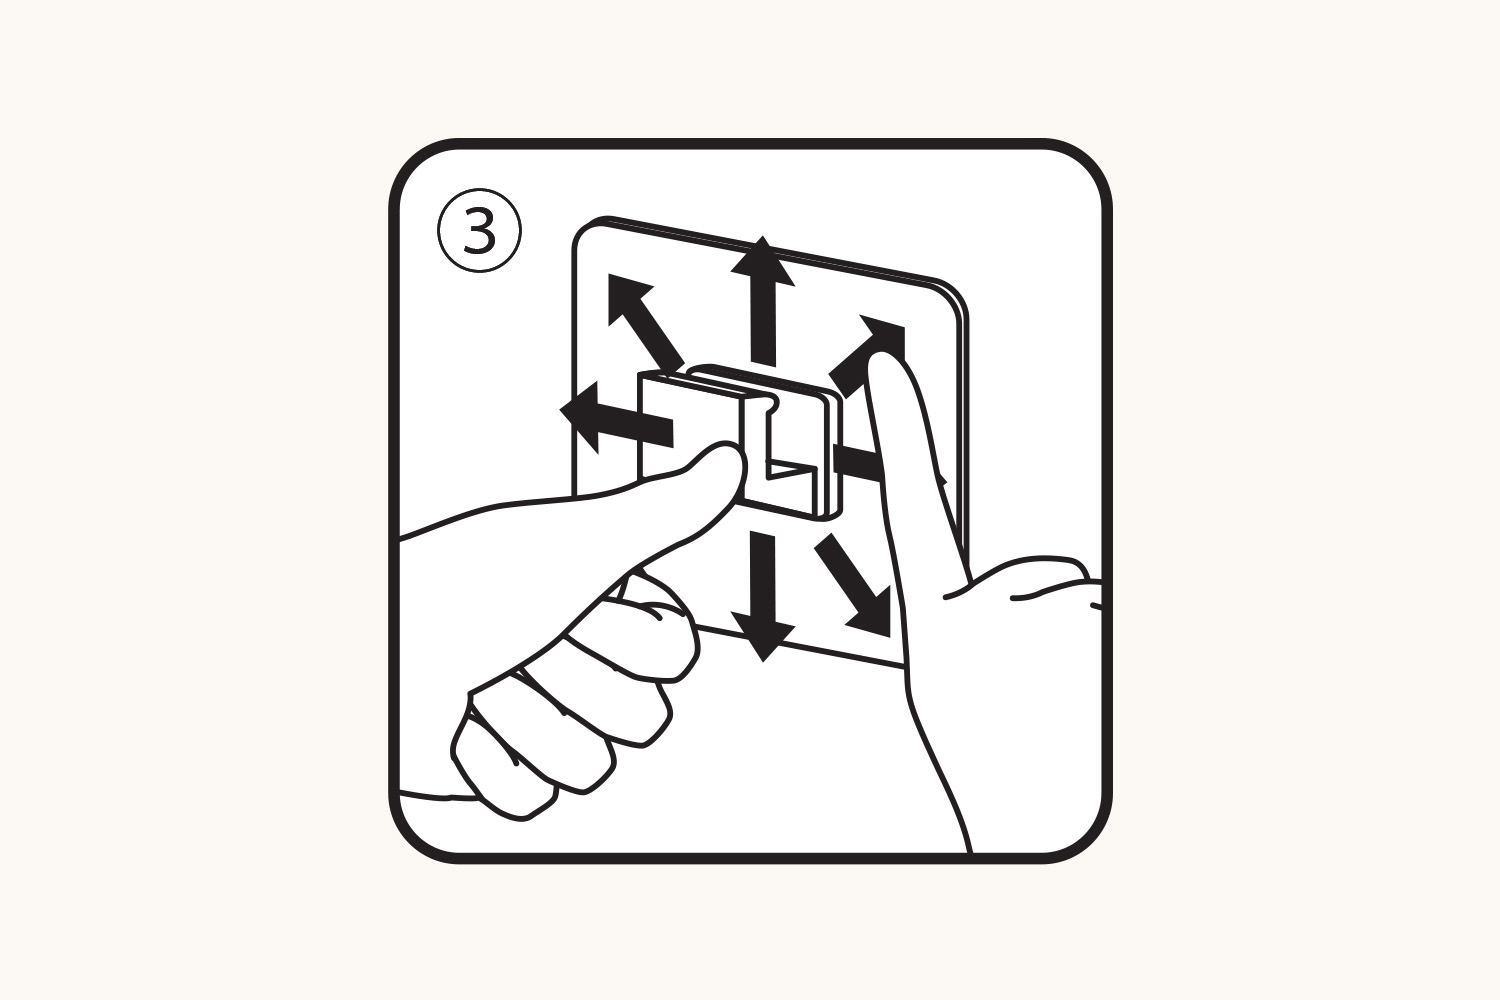
3.
Press the adhesive firmly onto the wall to secure the mount, and use your fingers to remove any air bubbles as shown in the illustration.
Wait at least 30 minutes after installation for the adhesive to set before use.
Removing The Traceless Adhesive
Start peeling the film from one of the bottom corners. Remove the rest gently with both hands to avoid making creases in the film. Our traceless adhesives can be used repeatedly, but note that the adhesion will deteriorate each time it is dismounted.
Bending or forcefully pulling the film can cause warping, which can render the adhesive ineffective. Peel gently to avoid damage.